
Robots
XGO SERIES · USER MANUAL

XGO-Rider2

Desktop-level two-wheeled bipedal development platform

Get to know your robot, from first start to development.

Original foldout · English & Chinese · 52.9 MB

XGO-Rider2

User Guide

1

Product Introduction

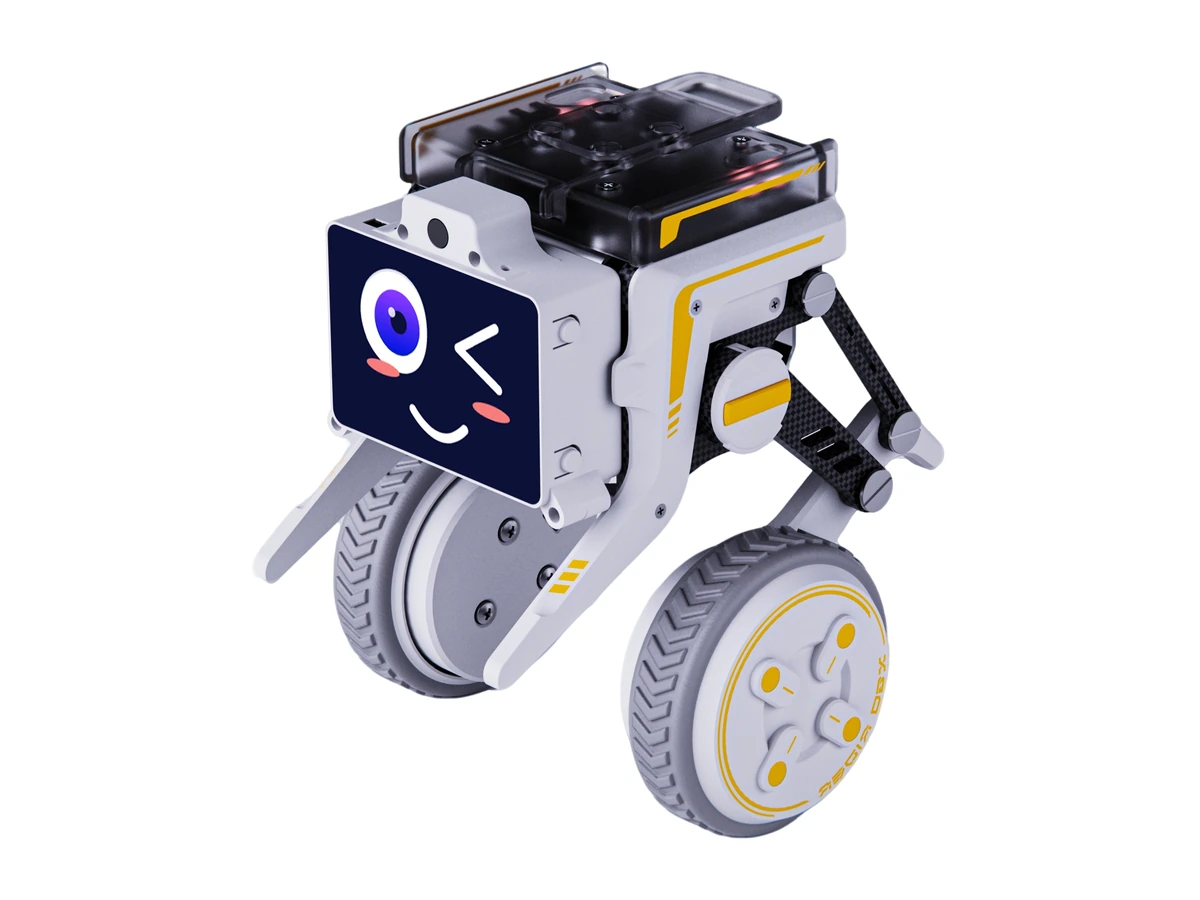
The XGO-Rider2 is a desktop-level two-wheeled bipedal development platform based on the Raspberry Pi. It has a built-in Raspberry Pi CM5 module to achieve AI edge computing applications. It uses a 4.5KG.CM full-metal magnetic encoding bus serial servo as the joint, and an integrated FOC hub motor as the wheel. It can achieve omnidirectional movement, stable posture, superposition of multiple movements, and interactive functions of images and voices. An IMU is installed inside for algorithm verification and secondary development.
Product Introduction
2

Power ON

Make sure to place the two-wheeled biped robot on a flat floor or desktop according to the picture below. Toggle the robot's switch to turn it on. After the robot's colorful lights turn on, it will stand up automatically. Once the robot stabilizes, the initialization is completed.

3

Straighten up

When the red light of the two-wheeled biped robot turns on and its legs retract, it indicates that the robot has entered the locked state. You need to hold the robot upright for about 3 seconds as shown in the picture below, and then the robot will return to the standing state.

4

Connect to the network

Quick method: Add a new SSID on the router or mobile phone. Set the SSID as XGO2 and the password as LuwuDynamics. After the robot is started, it will automatically connect. For other methods, please refer to the official XGO wiki. https://wiki.xgorobot.com

5

How to use

LUWU OS is a graphical system running on the Raspberry Pi CM5. Following operational prompts on the 2.0-inch screen, users can directly navigate Generative AI, vision tracking, and motion features using four physical buttons (A/B/C/D) for selection and confirmation, entirely free from PCs or phones.

6

Charge the Robot

When the robot is powered off, use the included Type-C charging cable to connect it to any 5V charger. During the charging process, the red light on the back of the robot will turn on. Once the robot is fully charged, the green light will turn on.

7

Development

1、Use the Micro HDMI cable that comes with the robot. Plug one end into the port at the lower left of the robot's screen, and connect the other end to the monitor. At the same time, insert the included Type-C USB Hub into the port at the lower right of the robot's screen. Plug the mouse and keyboard into the Hub, and then you can operate the Raspberry Pi desktop. 2、After the Raspberry Pi connects to the network, log in remotely via SSH on your PC. The default username and password are both luwu.

8

Remote control

For iPhone users, search for "XGO" in the App Store and download and install it. For Android phone users, search for "XGO" in their respective app marketplaces and download and install it. If the app is not available in the current phone's app marketplace, you need to download the APK installation package from the official XGO Wiki page and install it.

9

Precautions

Maintenance and Transportation: 1、When the robot is running, make sure that the desktop is stable. Avoid the robot from falling off the desktop due to unexpected situations such as vibrations and collisions, which may cause damage to the robot body. 2、Check the battery level before each use. Charge the battery in a timely manner when the power is low, and avoid using it for a long time in a low-battery state, which may affect the battery life. 3、Please pay attention to safety when using this product and avoid getting your fingers pinched during the movement process. 4、The servo and motor of the robot may get hot after running for a long time, which is a normal phenomenon. However, continuous heating may damage the performance of the servo. Therefore, it is recommended that the continuous use time should not exceed 1 hour. 1、Regularly check whether the screws are loose and tighten them. 2、When transporting or storing, please use the dedicated packaging box of the robot to avoid accidental damage; the two legs should be fixed to prevent damage caused by friction and collision due to shaking.

10

AI Intelligent Interaction

Face following · Hand recognition · Wireless networking · Handle control · Radar expansion · AI voice interaction · Hotspot mode · Group performance · AI vision interaction · VTM Show

Notice: Hi luka! Technical Support: hello@xgorobot.com